How to make Gifs for Instagram
- Ivna Lins

- Feb 3, 2020
- 5 min read
Hello! I've been making lots of gifs to use on instagram these days, so I thought I could come here and show you my process to how I go about doing them :)
We're gonna go through 2 big steps:
1) making the gifs on photoshop and
2) putting them out there for everybody to use on instagram via the giphy website

Part 1 - Gif Making! YAY!
Wait... what is it exactly? This Gif thing? I've seen it so many times!
Around the internet, we see the word "gif" a lot. It stands for " Graphical Interchange Format file", and what that means is that this a format to display animated things in the computer world. As you already know, they can be a little excerpt from a movie, tv show, music video, or it could be something made from scratch. Or a meme, it could definitely be a meme! The ones we're gonna focus on this article is the "handmade" ones. These gifs are, in their essence, fairly simple hand drawn animations, where you.. well, draw a series of positions of a subject so that it gives you an illusion of motion. You know how it works to make video, right? If you take a bunch of photographs super quickly, our brains will read that as a movement, so we're basically emulating the same principle applies with animations. You have to draw enough to make up the full scope of any movement you want to conceive, as if you're "drawing" every photograph (or photo-frame) on a movie. An even simpler way is to make a few of those drawings and loop them, so that they'll keep repeating themselves forever. The more intricate you want your animation to look and feel, the more skilled you have to be in drawing and understanding the movement behind your subject. Animation is quite an interesting topic to go crazy on, because it's connected to our favorite movies, to our childhood, to many popular videos on youtube and all over out chat apps. So if you wanna go deeper into this theory part, you want to read a bit on timing, intervals, and look up some animation principals.
Ok, cool, I wanna start animating! What should I have to begin with?
Many softwares (including free ones!) are offering this possibility, because of its popularity. I know photoshop and procreate are the most accessible ones, and for this tutorial I'll be using photoshop, but remember.. up to this day there are still people doing really cool animations with cheap pencil and paper, so whatever you have works! :)
*bonus: if you like this animation world in photoshop, you'll enjoy this amazing plugin "animdessin", that gives you a toolbar window with plenty of tools to work with and make your life a lot easier! it's super cool!
I wanna get to woooork, how do I start?
Setting the document size
First things first, the size of the document always translate to what you wanna do with it. Ok, captain obvious, what size should I create then? Since we're talking instagram, that's a primarily mobile app, so anything bigger than 1080 px would be automatically resized anyways. For really small animations like little faces, abstract decorations or arrows, for example, i'll go with 500 x 500 px or 700 x 700 px. For bigger shapes and characters I'll pick from 1000 x 1000 px to 1500 x 1500 px.
Deciding your workflow
There are two ways of animating in photoshop: "frame by frame" and using a "video timeline". For this article I'll pick the frame by frame one, which is usually what I use for quick gifs. But I'll leave you these really amazing tutorials for the video timeline :)
Knowing your timing
We're always gonna keep remembering the idea that, to animate, you must draw each movement in a single frame. For all my animations I'll usually make each one last from 0.1 to 0.3 seconds (0.1 for super quick passes, 0.2~3 for the ones lasting longer on the screen)
Frame by Frame
For simpler animations, like little faces or letters, I'll use frame by frame. It's quick, easy to navigate and understand. To open your frame by frame timeline, check:
Window > Timeline

There is a panel to show your frames down there, and your usual layers panel on the left. By default, anything you draw on your layers are gonna show on your first frame. The basic rule is: if you want it to show on your frame, make the layer visible; if you don't, hide it.
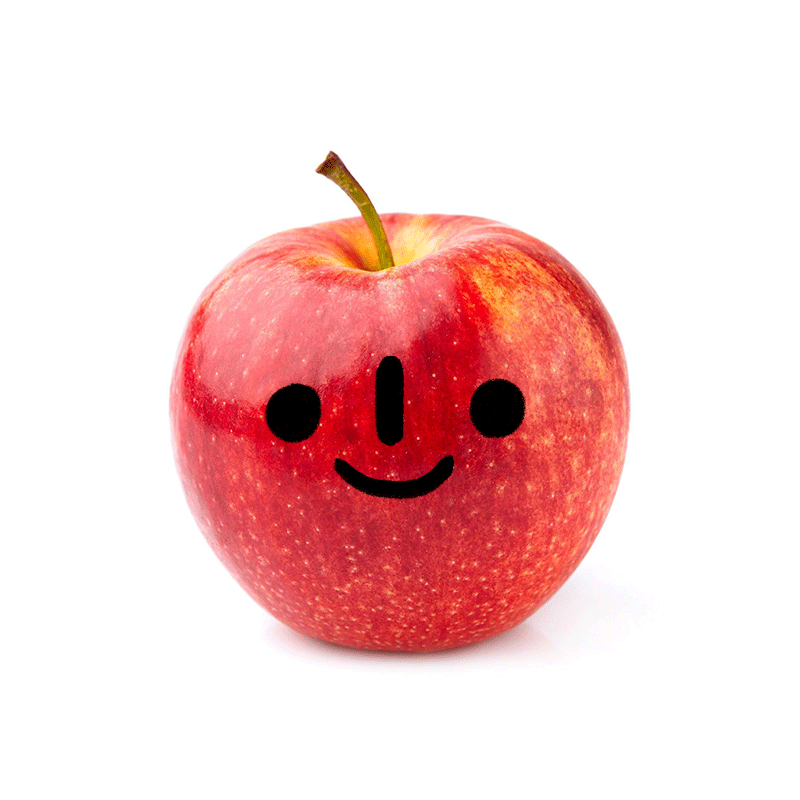
Let's say i'll put a face on an apple I stole from google.

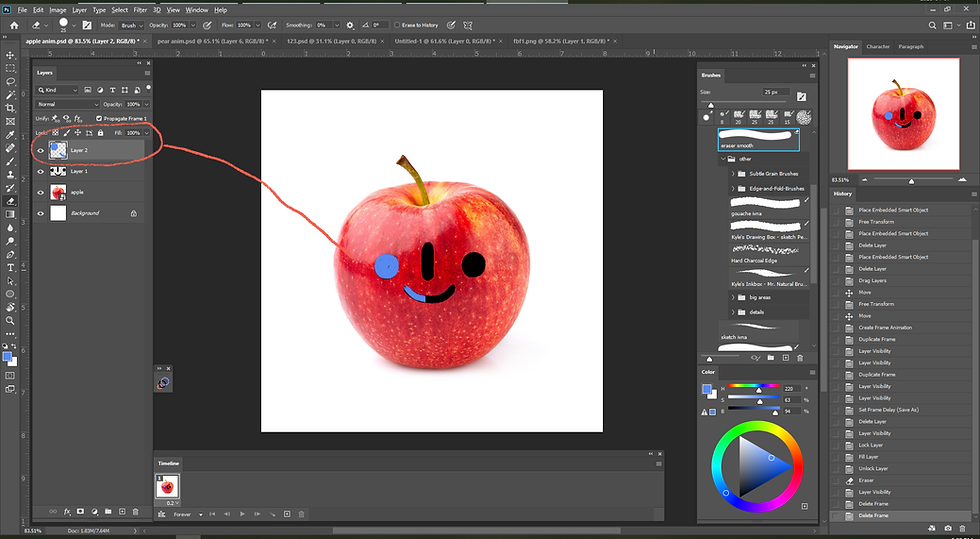
I'll begin by dragging the apple into the document, then creating a new layer where i'll draw my first frame.

Then I create a second layer, change to a different color so I can easily see where i'm at, and I start tracing on top of our first layer - not perfectly accurate, but not completely crazy as well. A nice middle ground. The slight differences between our layers will make our illusion of motion, so you want to make it subtle and smooth, but also noticeable.

Usually for simpler animations that I'm gonna loop, I'll draw 3 layers on top of each other with different funky colors and once I'm done, I'll color them all like I actually want. Until now, since we haven't made any changes to the timeline panel, all layers are showing on our first frame. So it's time to create some more frames and make our layers visible where they should show. First layer - first frame, second layer - second frame, third layer - third frame.

To time them correctly, I select all of the frames and hit "0.2". You can always press the play button to check how it looks and adjust. Depending on the complexity of your animation, you can have different timings for different sections, it's completely up to you and the effect you want to create.

If you have more than one layer for each frame (with details or filling in spaces, for example), you just make them both visible at the same time for that frame.

I love my animation, how can I throw at everybody's face?
Let's say you're happy with your cute little gif, and you're ready to annoy your friends and force them to like it too. Let's... save it as a gif file!
File > Export > Save for Web

I don't really change much on the settings, but do remember to check the "matte" option as "none", or your gif is gonna have an annoying border around it. This border is used to blend with the background in the case of a transparent file, but since we don't know the background we're gonna place it to, we're not picking any specific color, just generating a generic transparent gif). Also, don't forget to set the "looping" to "forever", so we can appreciate it going on and on and on and on...

Part 2 - Gif Showing! WOO!
Instagram has a partnership with Giphy, so we need to upload them there. We need to create a giphy artist account, which you can do here.

To have an artist account you need to make and upload at least 6 original gifs of your own. Once you upload 6 gifs and apply for the artist account, you gotta play a bit of a waiting game until they review and verify your account, But don't worry, even if that takes a while, you'll still get to see your beloved gifs on instagram and use them :) From my experience, they take around a few hours to show up on the instagram app once you upload them.
Now it's time to create some fun stuff and, of course... show me! I can't wait to see what you create :)


Comments